Chalkboard Art Tips & Tricks
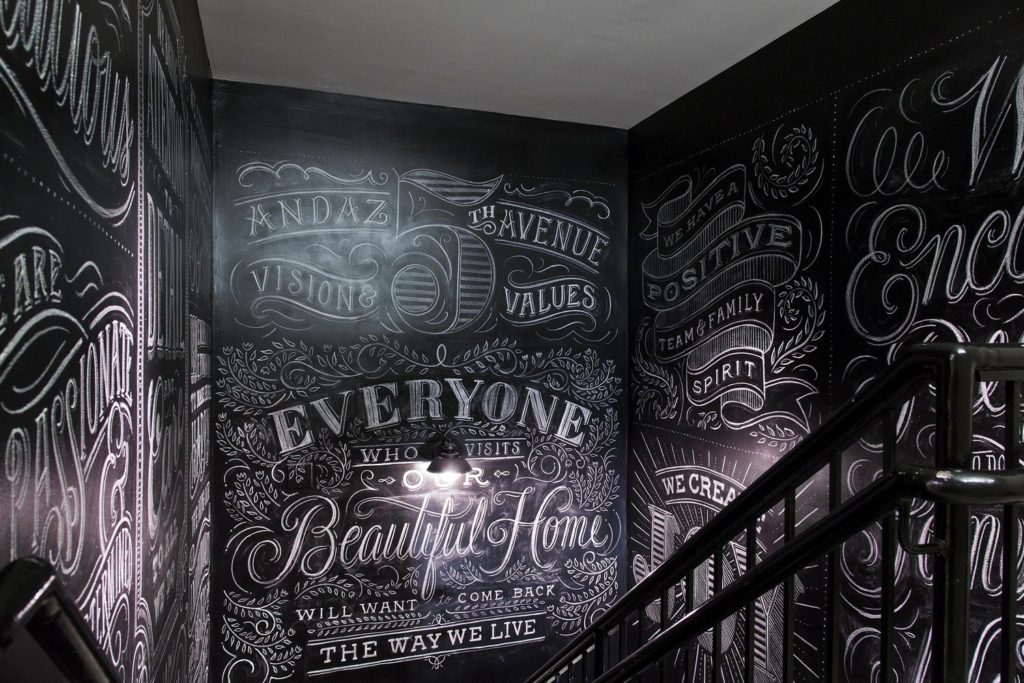
Have you ever seen those giant murals or chalkboards with intricate designs that look hand-lettered? You may be thinking, “How did they get their artwork on that wall so perfectly on such a large scale?”
We all have our own techniques, but today we’re going share one of our secrets on how to create chalkboard art that is precise, fast, and efficient. It is a fun and easy way to transfer your artwork that started as a sketch or digital art file at a small scale to a beautiful mural or chalkboard masterpiece. To give you a hint, a projector will be involved as a key tool.
Before we dive in, here are the materials you will need:
- Adobe Illustrator
- A desktop or laptop
- HDMI/Adapter to connect the projector to your computer
- Projector
- Bistro chalk markers (you can also use regular chalk)
- Chalkboard
- T-square/ruler/straight edge
*Optional
- Paper Towel
- Container of water
- Q-tips
- Sketchbook
- Pencil/pen
- Painters tape
- Sealer Spray
Inspiration
Dana Tanamachi | Tanamachi Studio

Scott Biersack | youbringfire
First, start by researching what style lettering or font you want for your chalkboard. If you’re feeling stuck or clueless on where to begin, Pinterest will become your best friend. This is one of our favorite places to look for inspiration. We usually search for “chalkboard art,” “hand lettering design,” or “chalkboard letters.”
You will also discover that Pinterest is perfect for “freebies” such as fonts, illustrations, or chalkboard art elements. There are also many other great resources (some free) out there to help get you started on your design.
Here are some of our favorites!
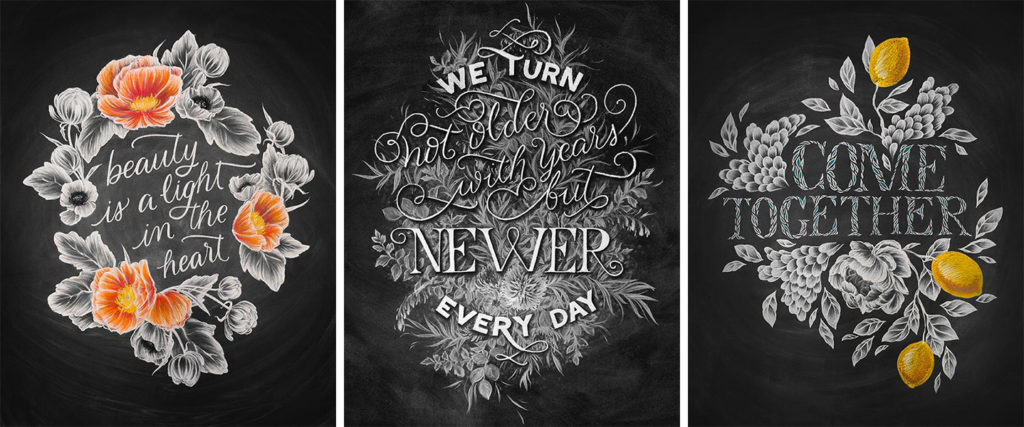
Casey Ligon
Step 1:
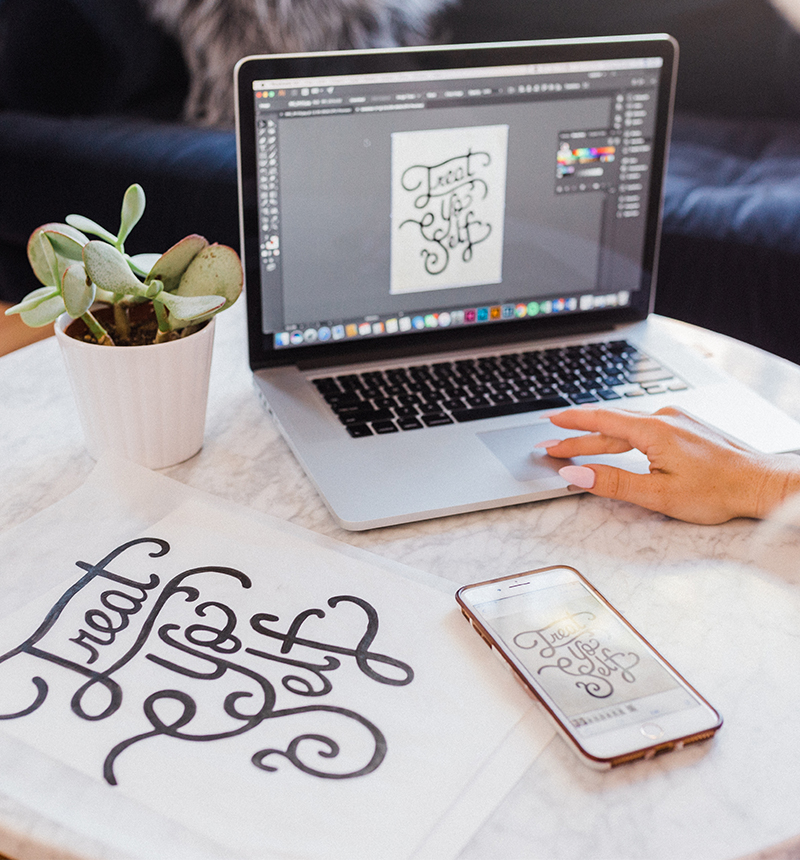
Option 1 – Design in Adobe Illustrator
Before you start on your design, be sure to measure your chalkboard to find out the dimensions, as you will need these dimensions when creating a new art file in Illustrator. We like to use the same scale to ensure the design will fit nicely on the chalkboard. Also, now would be a good time to download and load any fonts and graphic elements you want to use for your design. Of course, you can also create your own! Once you have figured out the style you are going for, you can proceed to Adobe Illustrator. You are now ready to start designing.
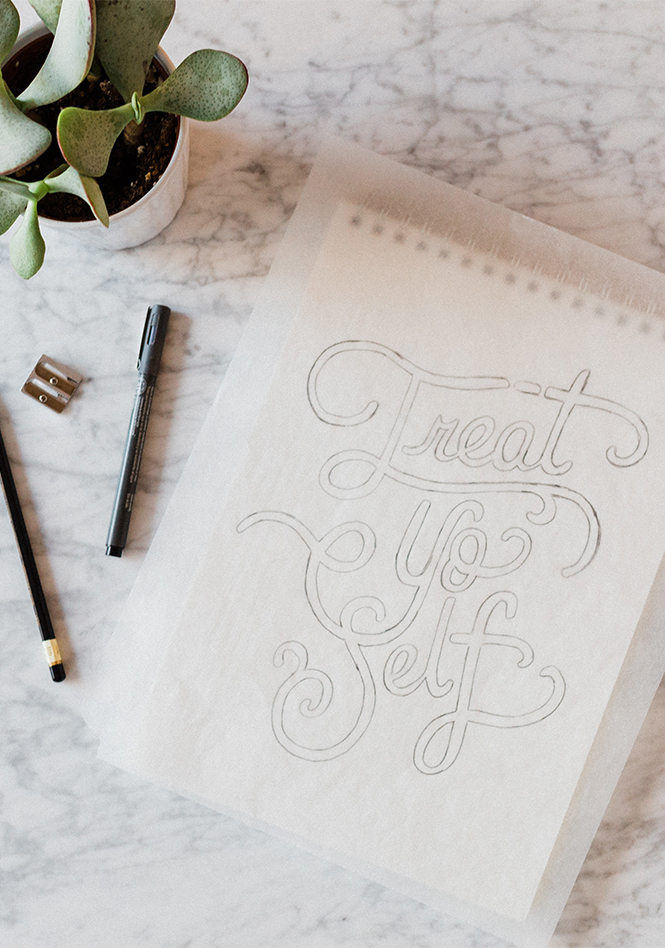
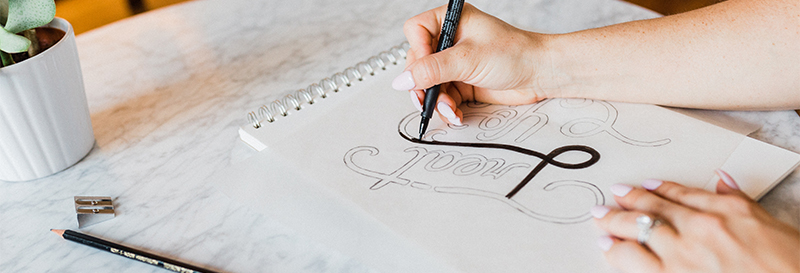
Option 2 – Freehand Sketch
If you’re feeling brave, you can skip the previous step and sketch your own custom drawing in your sketchpad. Again, try to use the same scale as your chalkboard when sketching the design. Once you finish your design, take a photo of it on your phone or camera and send it to your computer. Today we’ll be free-handing our design for this tutorial.
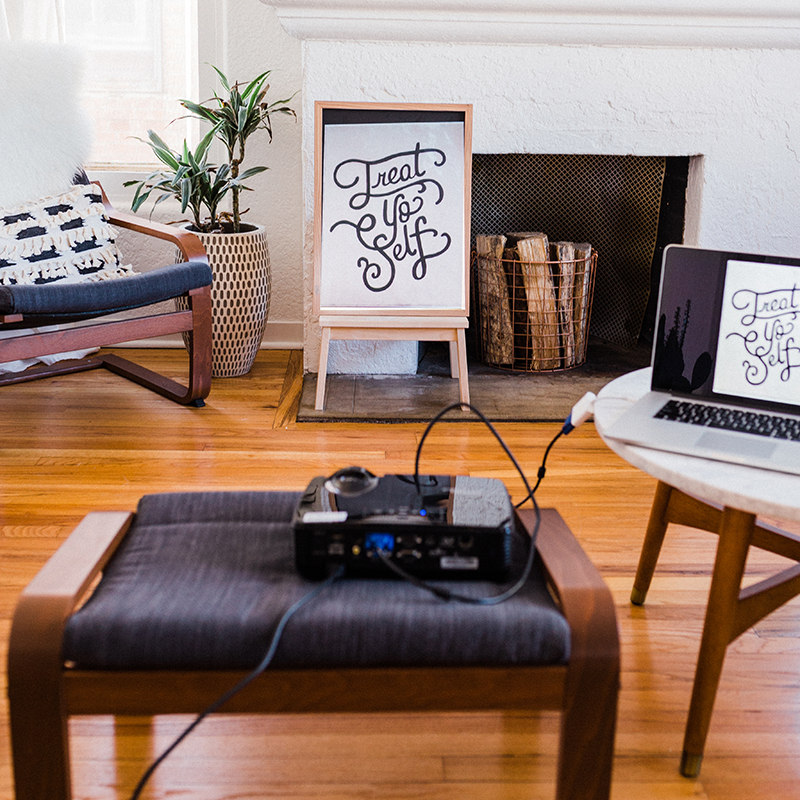
Step 2: Projector Setup
Once you have finished your design and are ready to begin “chalking,” there are a few things to keep in mind when setting up a drawing station. Since you will be using a projector, you must have clearance for the projector to sit far enough away from your board. We would also recommend working in a dark space so that you can see your design being projected onto your chalkboard. Lastly, just any projector will not do. Something with high-intensity light is recommended so that you can clearly see what you’re working on. This is a favorite projector that we’ve used. When we use the Optoma EH336, we are still able to work in intense light situations. It has higher contrast and amazing pixel structure. Be sure to have any additional cords on hand such as an HDMI for your computer to the projector. You will likely need an extension cord since most projectors don’t offer much length to their cords. You should now be ready to open your design on your computer and project to your board or wall. Position and focus the projector until the design is centered on your board. Prior to using the chalk markers, trace just the outline of your design using a pencil or chalk pencil. Or, you can skip this step and just wing it using the chalk markers. This is totally up to you.

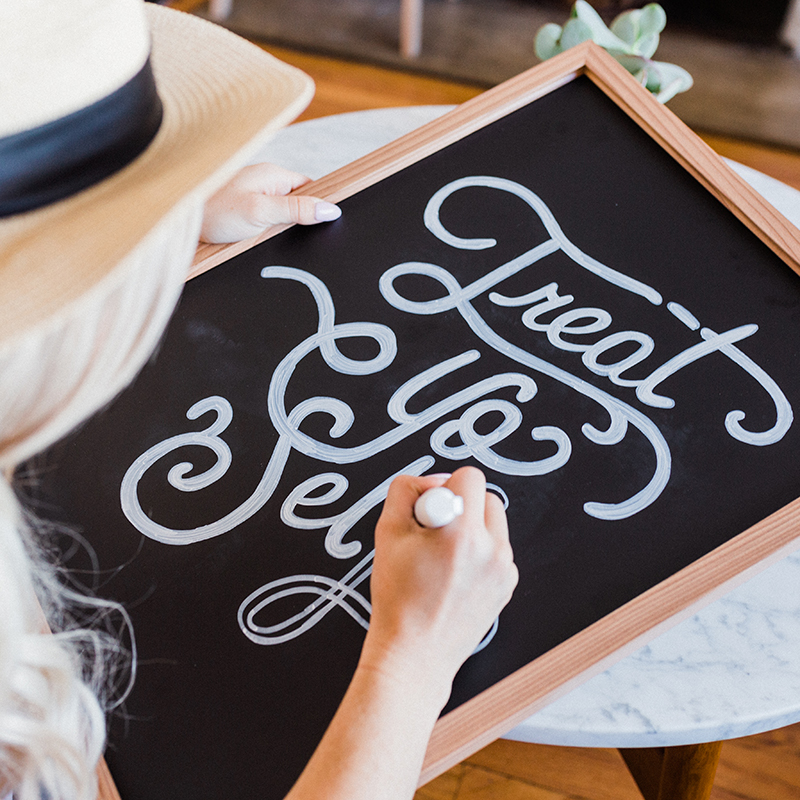
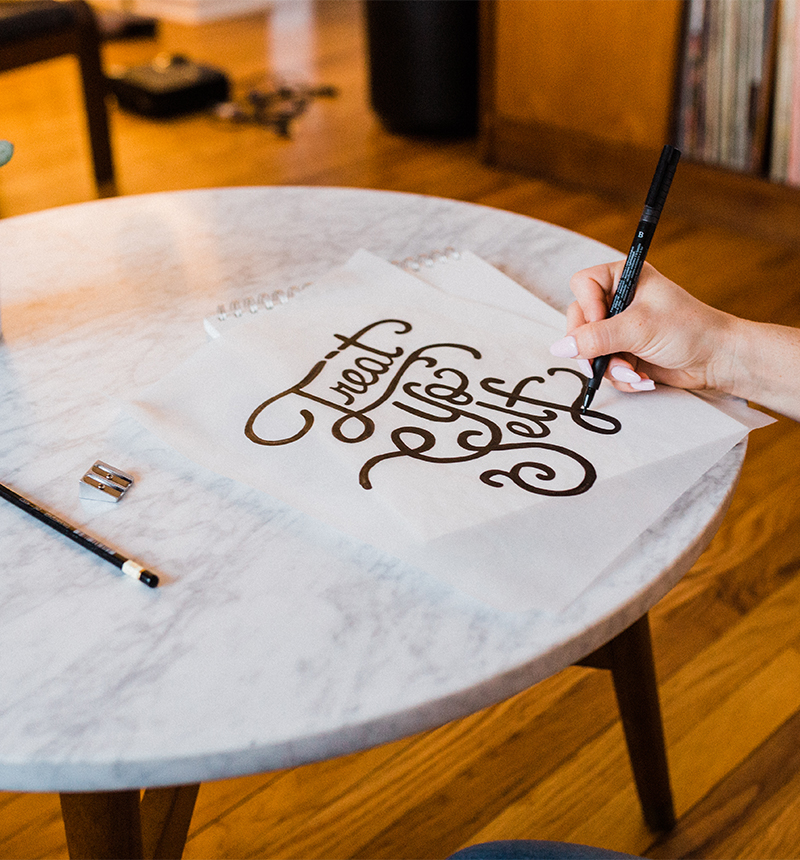
Step 3: Projection
Now that you’re all set with your design and projector, it’s time for the bistro chalk markers. We normally use the white Bistro chalk markers from a local craft store (usually Michael’s), but they do offer a variety of vibrant colors if you want to incorporate color! Another great place to buy markers is on Amazon. We’ve had the most success with the Bistro and Chalktastic brand. The reason we use markers is that we prefer a clean, crisp line. If you’re want to go with a more rugged, faded look, you may prefer real chalk.
Step 4: Clean up
This step is optional, but if you’re a perfectionist like some of us, you may want to continue reading.
After you’re done with the drawing, take a q-tip, dip it in water, and clean up any lines you feel need a little love. Sometimes we also do this step throughout the drawing process if we “mess up.”
Step 5: Seal
If you don’t want your design to get smudged, we’d recommend purchasing a sealer to help hold your drawing intact. We’ve have found that hairspray actually works much better than traditional craft fixatives.
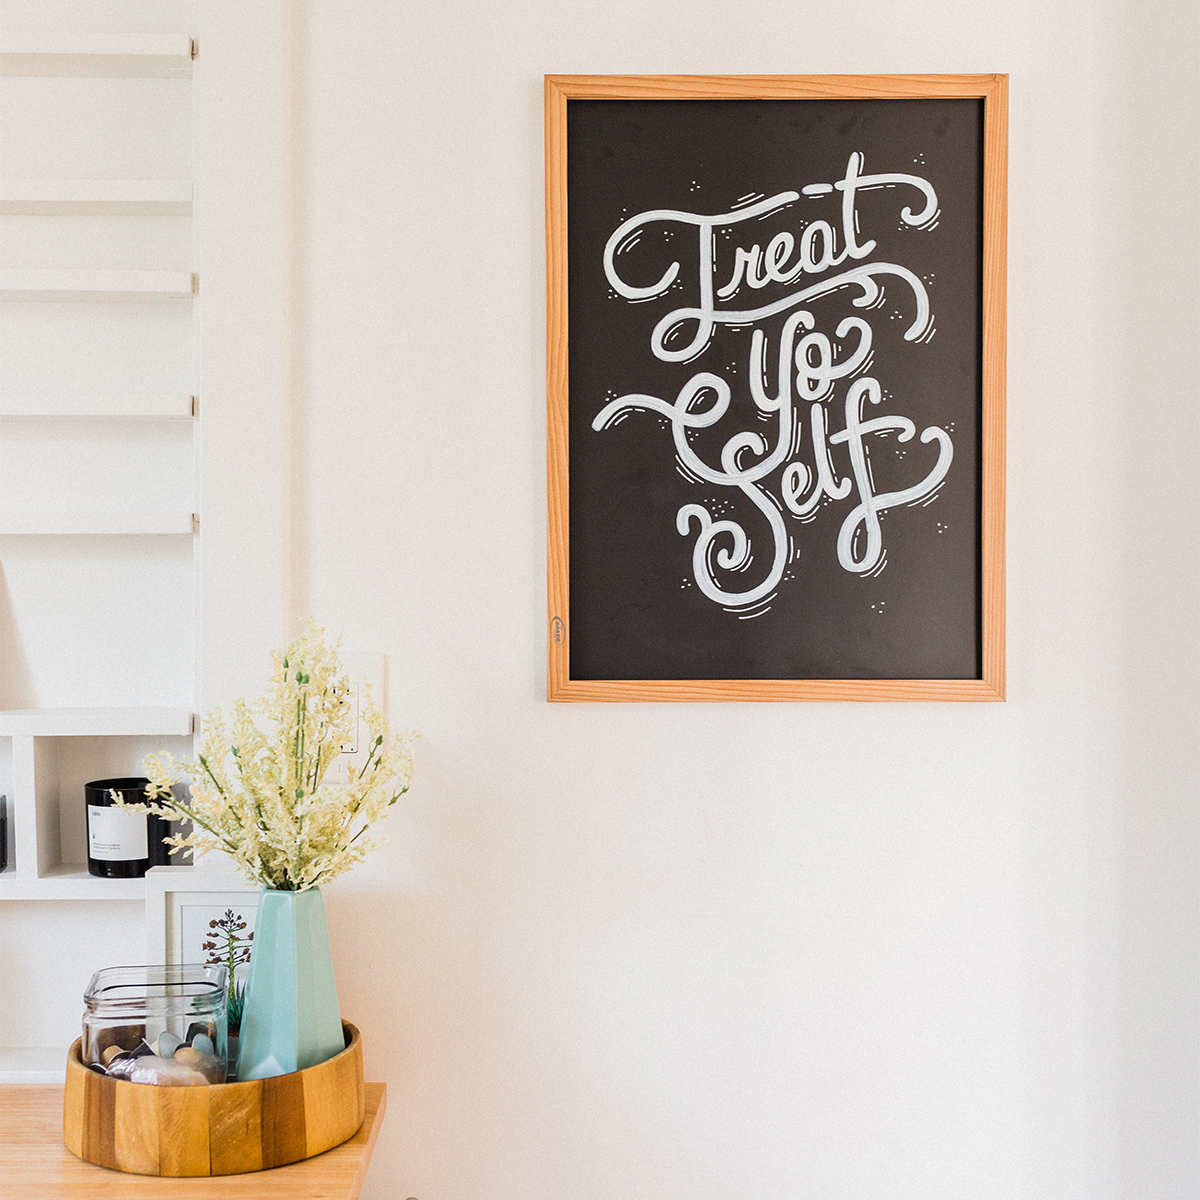
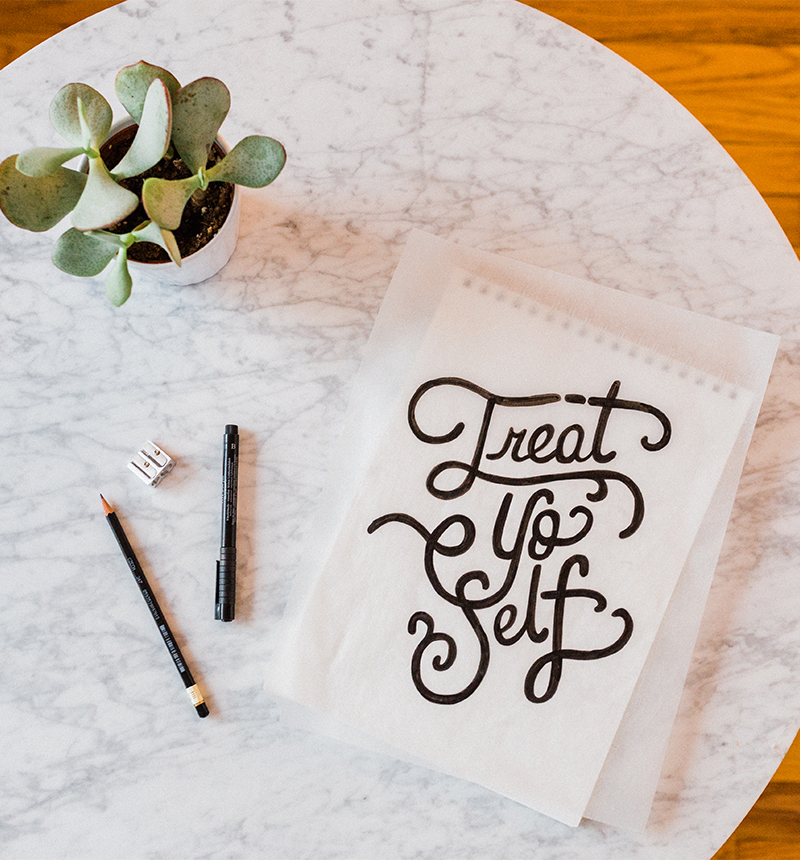
Voilà!
You are now finished and ready to hang up your chalkboard!