5 Reasons to Love the Selection Pane
PowerPoint Pro Moves S1E8
In this blog post, we’ll explain what the Selection Pane is and share five reasons why this amazing feature can help you bring supernatural speed and precision to your presentation workflow.
Q: What is the Selection Pane? (A: It’s a layered question.)
Whether you know it or not, every new text box, image, starburst, video, or GIF you plop on a PowerPoint slide generates its own dedicated layer. As your slides becomes more complex—and more layered with objects—it can become really difficult to identify and select the right objects without disturbing your overall layout. This costs you time and adds unnecessary aggravation to your life.
Enter the Selection Pane. This handy tool gives presentation designers the ability to see a clean list of all their slide objects in one glance. While professional tools like Adobe Photoshop, Illustrator, and After Effects shine the spotlight on their layer management tools, for some reason PowerPoint’s Selection Pane remains way under the radar. Once, purely by accident mind you, a team member stumbled upon this feature and discovered its immense powers… and we’ve never looked back. In fact, we consider the Selection Pane an essential factor in our ability to produce complex presentations in short windows of time.
Hopefully, we’ve intrigued you about the Selection Pane, so let’s start our journey by locating and activating this hidden gem.
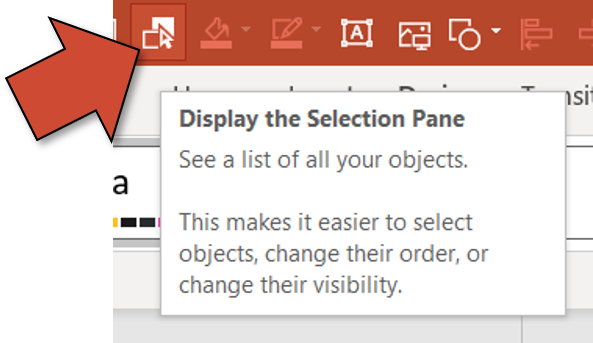
Where is the Selection Pane located?
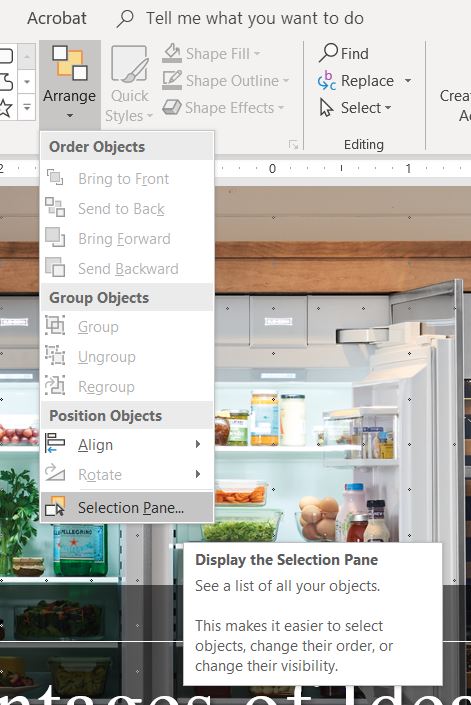
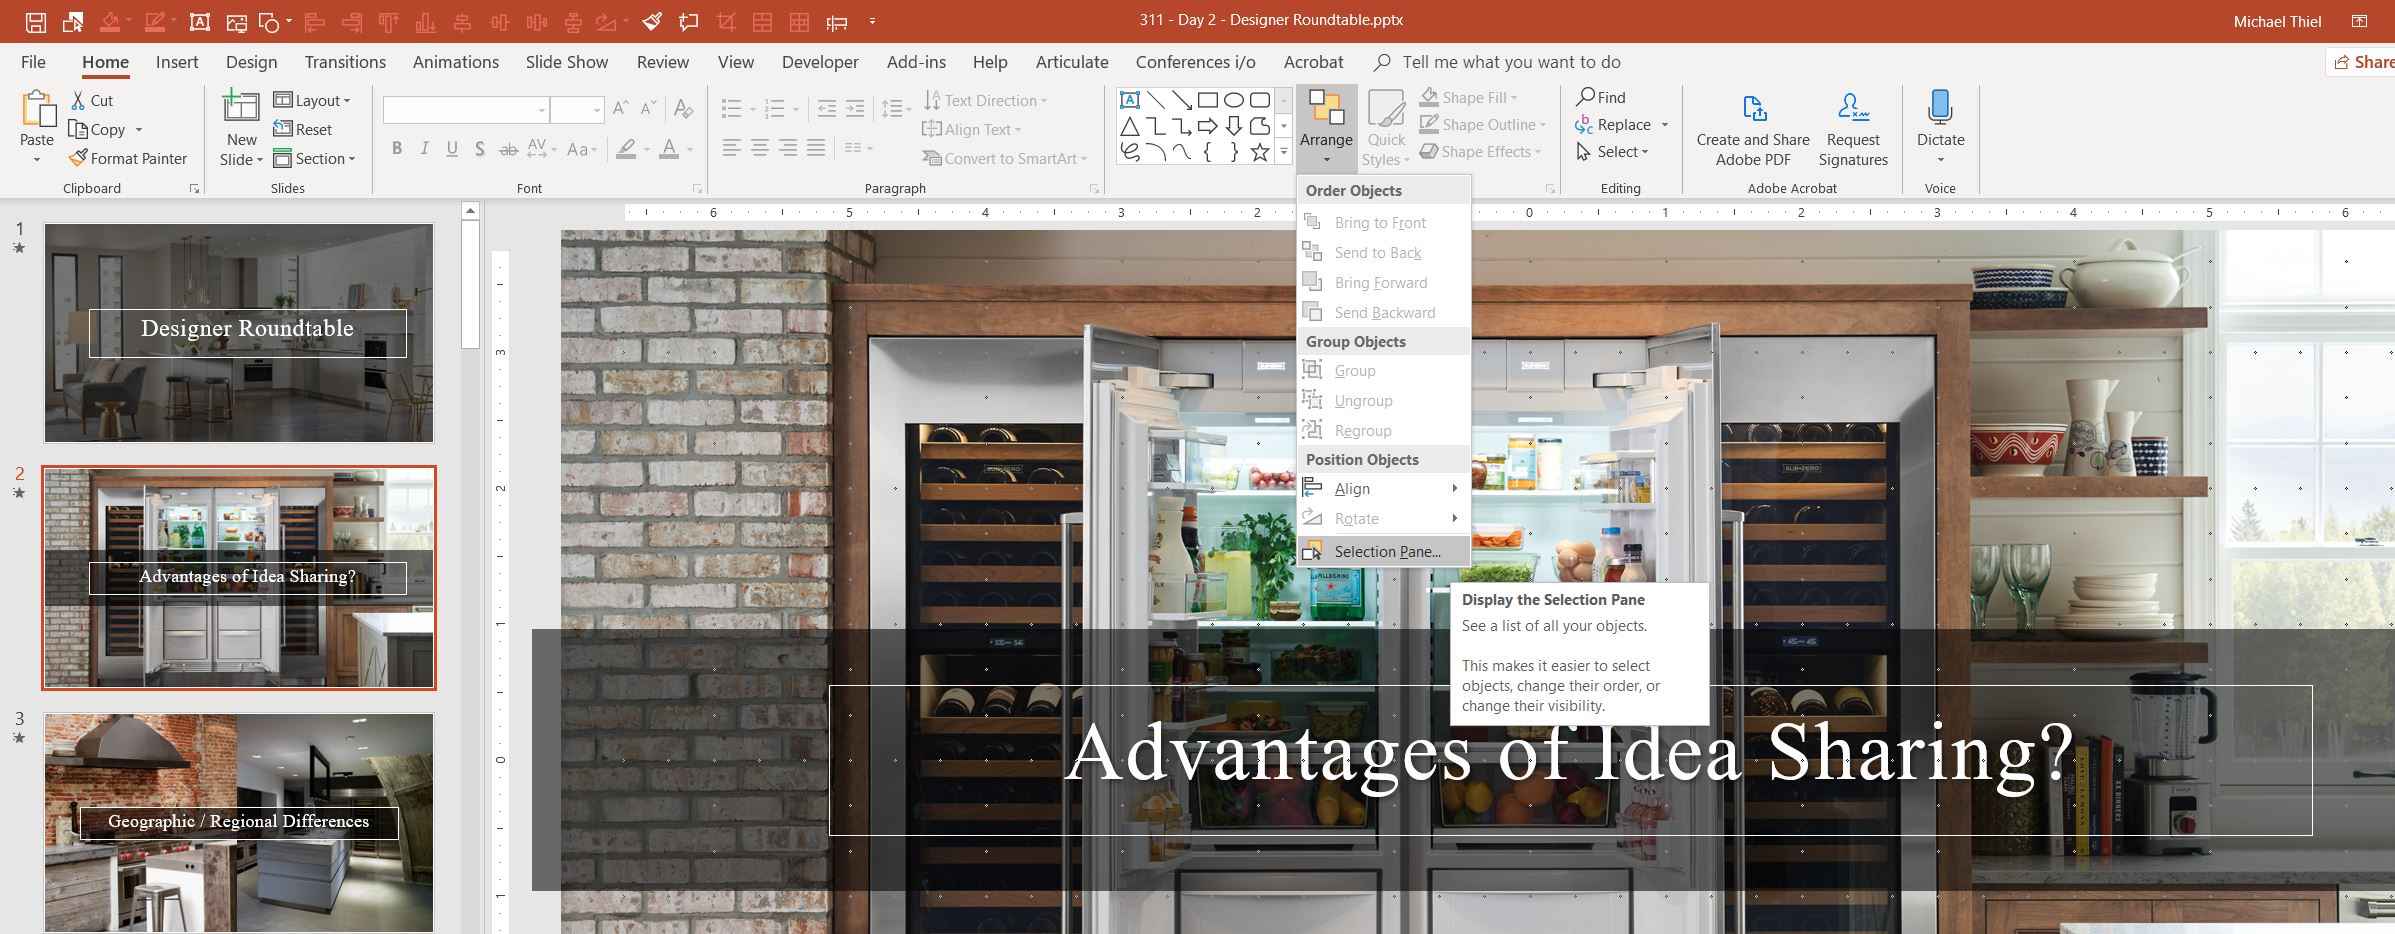
The Selection Pane is nested deep down in the recesses of the Arrange drop-down menu. Here’s how you find it: Home menu > Arrange drop down > Selection Pane (at the bottom of the list). Click it and you’ll see a bar show up on the right side of your PowerPoint workspace. You’ve done it!
Home > Arrange drop down > Selection Pane
The good news is that you’ve found the Selection Pane for the first time. The bad news is that it took you at least three clicks to get at one of the most powerful tools in PowerPoint. You deserve better. Let’s add this feature to your Quick Access Toolbar (see S1E2 – Customizing Your Quick Access Toolbar) so you can rapidly access it from now on.
How to add the Selection Pane to your Quick Access Toolbar
Adding the Selection Pane to your Quick Access Toolbar makes showing/hiding this feature a one-touch affair from now until the end of time (or at least until you stop paying Microsoft for your Office 365 subscription). Fortunately, doing so is super simple.
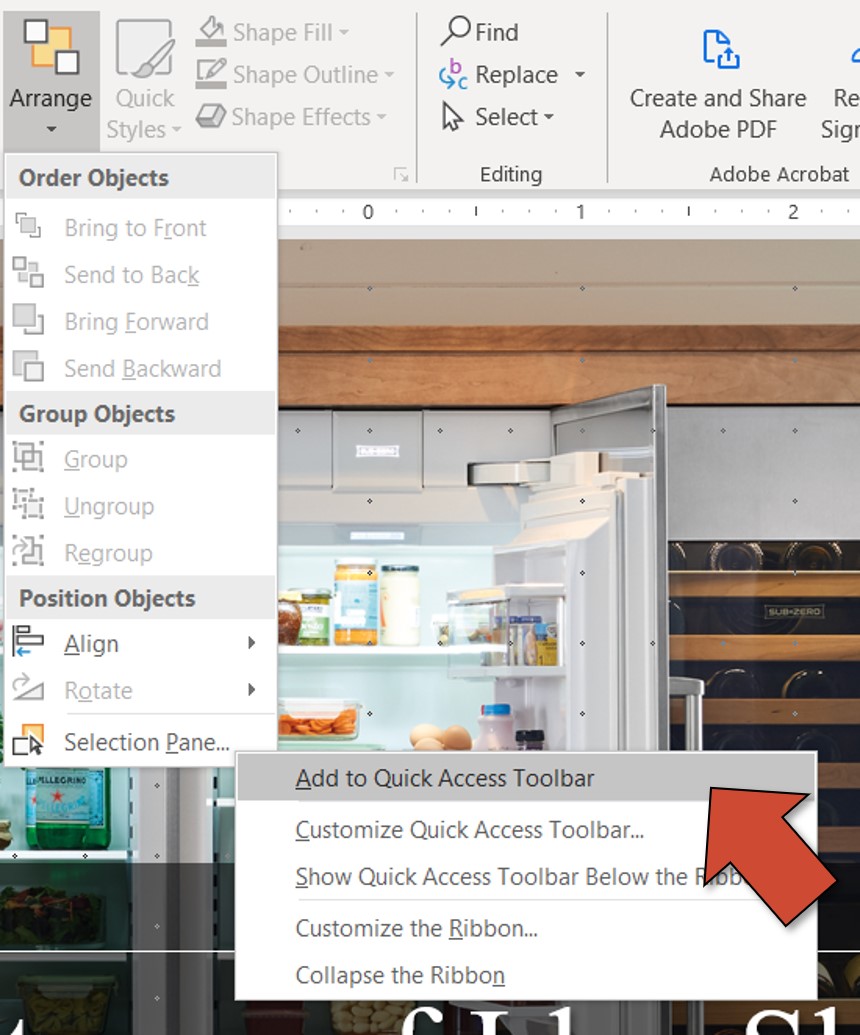
- Home menu > Arrange drop down
- Right-click on Selection Pane
- Left-click on Add to Quick Access Toolbar
From there, you’ll see it on your Quick Access Toolbar.
Five Reasons to Love the Selection Pane
Now that you know how to find and activate the Selection Pane, let’s talk about how this tool adds game-changing speed and precision to your PowerPoint workflow. From our personal experience, the Selection Pane delivers value in five ways:
Reason #1. Identify objects
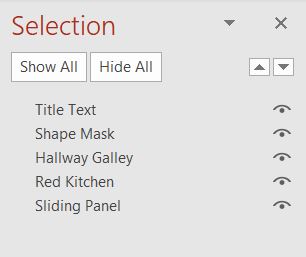
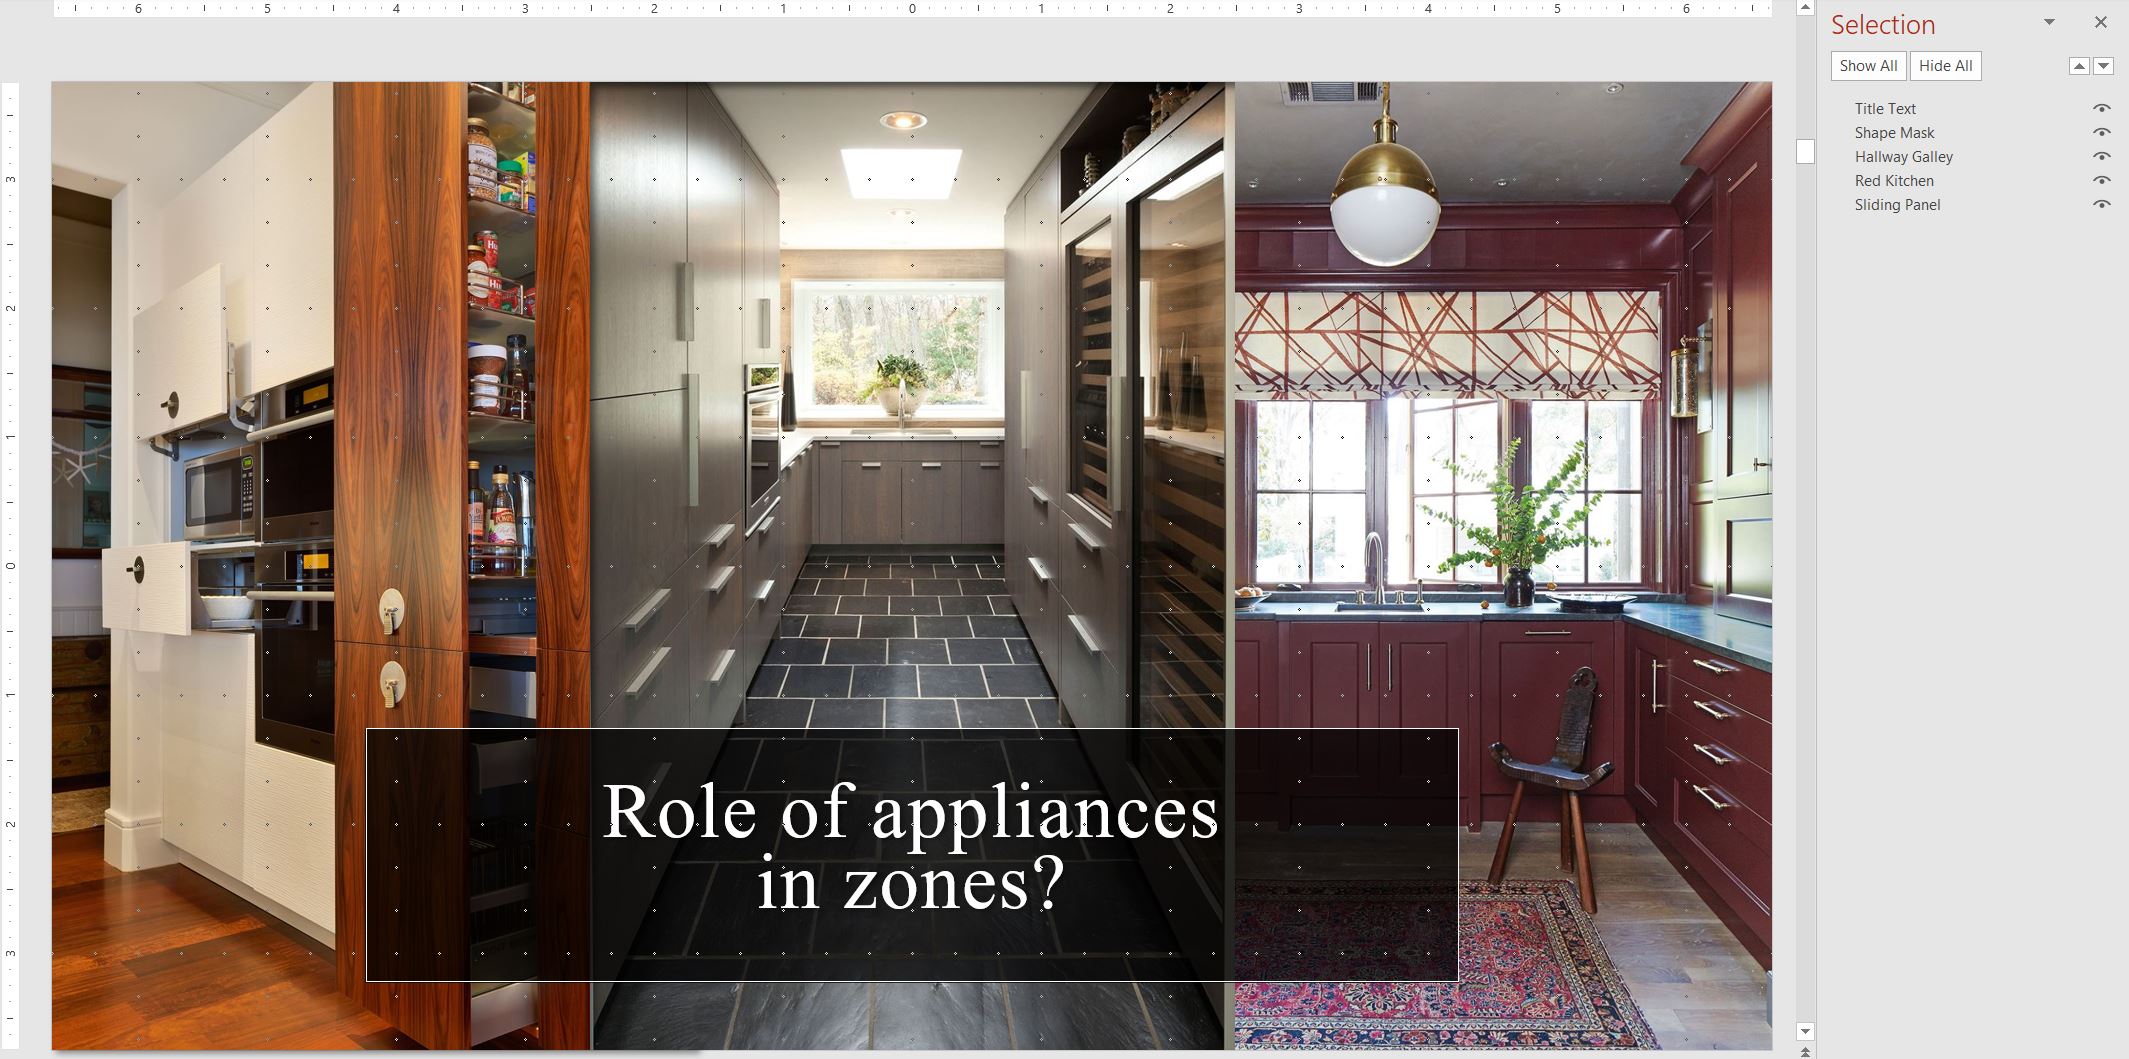
First, the Selection Pane offers a clean outline view of all the objects on a slide. Double-click on an object and you can even assign a contextual name to it. (Notice how each object in the featured Selection Pane image below has a “normal” name instead of “image 1, shape 1, etc.?) When you start building more complex and stunning slides, it will be essential to locate the right objects on your slides in order to work fast and efficient. As you can see, the Selection Pane makes this happen in a flash.
Reason #2. Select objects.
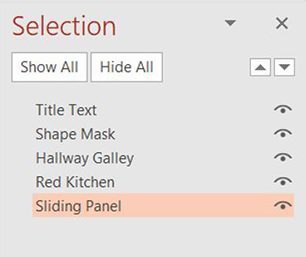
Yep, that’s right, the Selection Pane gives you the ability to cherry-pick a single object (or a group of objects) from even the most complex slide. Just click the desired object on your selection pane and you’ll notice how the corresponding object’s border highlights on the slide. Bonus tip: Hold down the CTRL key while clicking on objects to custom select a batch of objects.

Notice how the “Sliding Panel” image has its border highlighted? One touch of the Selection Pane made it happen
Reason #3. Move and manipulate objects.
Once you have selected an object (or a group of objects), you may use your keyboard’s directional keys or your mouse to do your bidding without disturbing the other slide objects. This is a massive benefit, especially when you have four, five, six… and more… objects on top of one another. Some key things you might want to do to achieve your slide design and/or animation goals may include:
- Change image transparency.
- Change image scale or position.
- Adjust a shape mask.
- Select a single object within a grouped object along with some non-grouped items.
Sure you can always use your mouse like a big, numb mitten to feel around on your slide to find the right object, but we’d prefer to opt for a single click on the Selection Pane and speed along with our business. Try it and you’ll see what we mean.
Reason #4. Monitor and manage layer hierarchy between slides.
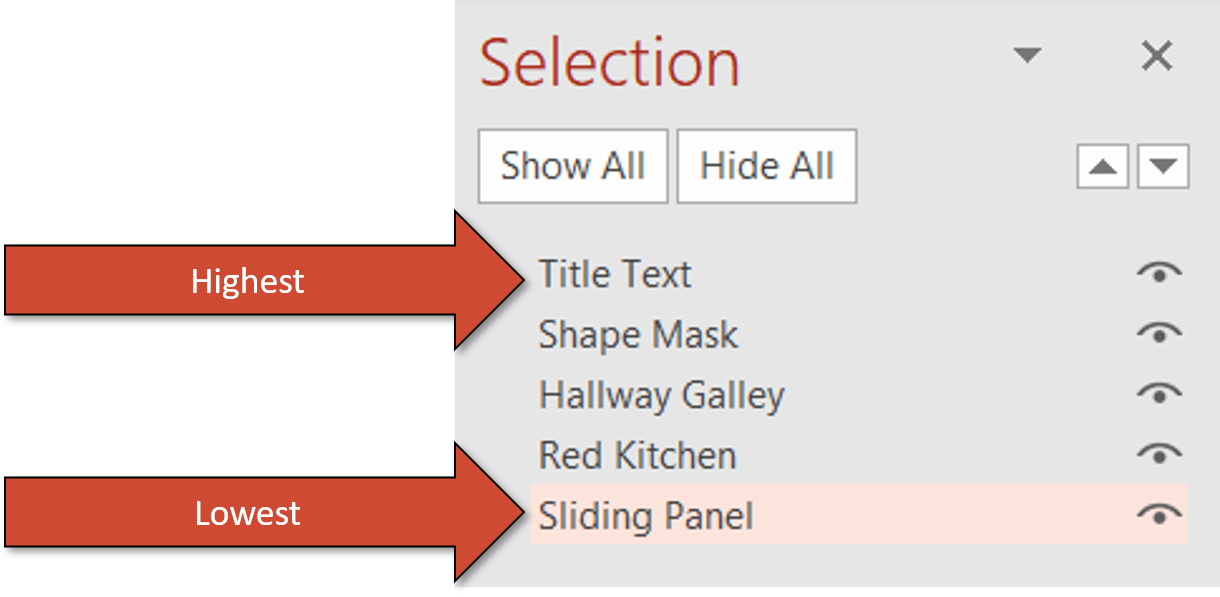
The fourth reason to love the Selection Pane is its ability to help you quickly monitor and manage the overall layer hierarchy from slide to slide. Objects on the top of the pane are at the top of the food chain while objects at the bottom will always be “sent to back”. Beyond making it extremely easy to drag objects up or down the list to optimize the look of your slide, knowing where your objects are in the relative layer hierarchy is an essential piece of achieving a smooth and seamless animation sequence using the Morph transition effect.
For those unfamiliar with what we’re talking about, here’s the deal: The Morph transition allows objects to change position, scale, and transparency between Slide A and Slide B. This single slide transition effect unlocks a world of possibilities to visually communicate your story in ways that were simply impossible P.M. (Pre-Morph, that is). The effect is beyond words magical, helping you achieve next-level animations in minutes.
However, like any good fairy tale, this one has a catch: the objects that persist from Slide A to Slide B must be in the same relative layer hierarchy in order to achieve that seamless and magical effect. If two objects swap relative order between the two slides, they’ll do what objects do—they’ll collide with each other, causing a weird blip during the Morph transition process. Seeing that weird object flickering is a bit like seeing a magician mess up a card trick in front of you. Womp, womp.
This is a bigger deal than you might think: every time you paste an object from Slide A to Slide B, it will always occupy the highest level on the new slide’s Selection Pane. Once you get into using the Morph transition, you’ll start depending on the Selection Pane to quickly drag that newly-pasted object on Slide B to the same relative level it was on Slide A. Performing this same operation without the aid of the Selection Pane would be an exercise in madness (and massive guesswork), we can assure you.
Reason #5. Show/hide objects without deleting them.

Now you see me. (The Sliding Panel image, that is.).
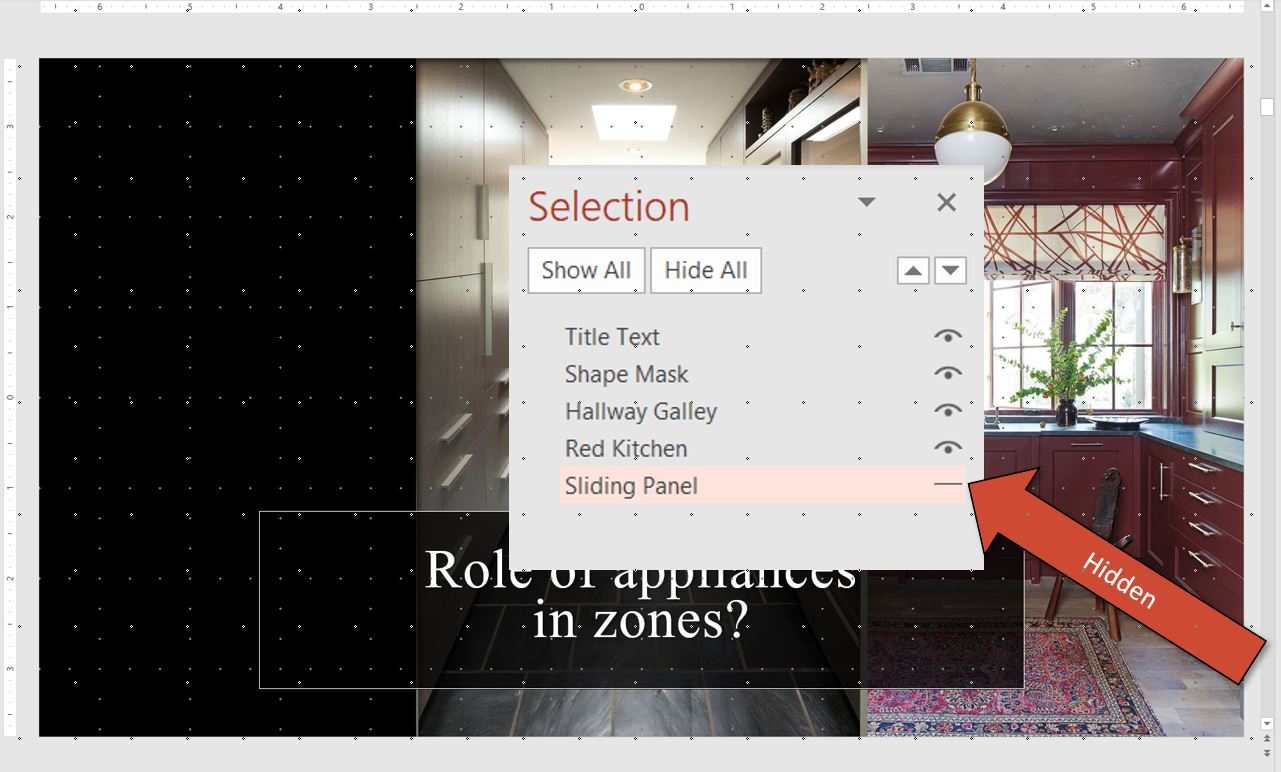
Now you don’t. (But, I’m still here. Just invisible.) .
The fifth reason to love the Selection Pane is its ability to show/hide objects without having to cut or delete them from the slide. This is an extremely useful way to help identify the right object, get your bearings in terms of the overall slide layout, obtain a cleaner look at various slide elements, or just tuck something away that you don’t necessarily want to delete. The two illustrations below give you an idea of the “show/hide” functionality at work.
Go ahead, make your selection.
So, there you have it: five great reasons to love the Selection Pane. After several years of using the Selection Pane, we’ll readily admit that we’ve become Selection Pane zealots. It is our hope that you too will discover the same increases in workflow speed and precision that we’ve enjoyed using this under appreciated tool. If you do, do us a favor and pass on the story of the Selection Pane to your fellow teammates. Here’s to your next great presentation!